Choose Parchment For Sticky Low Carb Dough
A practical step-by-step guide to choose parchment for sticky low carb dough, including preparation, instructions, common issues, tips, and next steps.
Choose Parchment For Sticky Low Carb Dough
Sticky low carb dough, made from almond or coconut flour, clings to everything it touches. Parchment paper is the barrier that lets you shape, press, and move that dough without tearing it or gluing it to your work surface. The right parchment has a silicone release coating, a matte feel, and enough stiffness to slide under a fragile round. The wrong sheet, such as a thin waxed roll or a shiny cheap liner, will bunch, soak, or fuse to the dough and ruin your bake. This guide teaches you how to read a parchment label, test a sheet in seconds, prepare it correctly, and rescue a dough that has already grabbed hold.
Fast Answer
- Choose unbleached parchment labeled with a silicone release coating and a temperature rating above your planned oven setting, then test a corner with a drop of water to confirm it repels liquid.
- If the dough still sticks, chill it for fifteen minutes, dust the parchment lightly with coconut flour, and lift the sheet edges instead of pulling the dough itself.
Before You Start
- Clear a flat counter area wider than your largest baking sheet so the parchment can lie fully flat without curling at the corners.
- Have a roll or stack of silicone-coated parchment, a pencil, and clean scissors ready so you can cut a sheet that overhangs the pan by about two inches on every side.
- Set out a small bowl of cool water and a clean kitchen towel, because damp hands shape sticky dough more smoothly than dry ones.
- Chill your portioned dough in the refrigerator for at least fifteen minutes before shaping, which firms the fat and reduces tackiness.
Step-by-Step Instructions
Read the parchment label first
Pick up the package and read the front and back label before you buy or unroll anything. Look for three words: parchment, silicone, and a temperature rating. Parchment that is coated with silicone on both sides releases sticky dough and survives typical baking heat. Paper sold as waxed or as a generic liner usually lacks that coating and will bond to your dough. Turn the roll over and find the small print near the barcode, because some packages hide the coating detail there rather than on the front. If the label only says non-stick without naming silicone, treat it as unknown and keep looking. This check matters because a coating you cannot confirm is the same thing as no coating, and low carb dough will find every uncoated fiber and grab it.
Match the sheet to your pan size
Unroll a length of parchment that overhangs your baking sheet by about two inches on each short side. Too small a sheet lets sticky dough creep onto the bare metal rim, where it will bake into a hard, dark ring that is difficult to remove. Too large a sheet curls upward in the oven heat and can brush the top element. Set the pan on the paper and score the paper with the back of a butter knife, then cut along the score line. For a round cake pan, cut a square that is wider than the pan, then fold and snip the corners so the paper sits flat. Verify the fit by pressing the paper into the pan; it should touch the bottom without folding over itself in the middle. This step matters because a flat, correctly sized liner is what actually keeps the dough from shifting while you press it.
Test the release surface
Before the dough touches the paper, run a quick release test. Sprinkle a few drops of water on the parchment and watch them. On a good silicone coating, the drops bead up and roll when you tilt the sheet. On a poor or waxed surface, the water spreads into a dull wet patch. Wipe the sheet dry with a clean towel, then rub one fingertip across the surface. A quality liner feels faintly slick and slightly matte, not greasy and not glassy. Repeat the test on a second spot near the edge, because coatings can be uneven along a roll. If the water spreads on both spots, set that sheet aside for lining a box or covering a bowl, and cut a fresh piece from a different roll. This check matters because it catches a bad sheet before your dough is already stuck to it.
Prepare the sheet and your hands
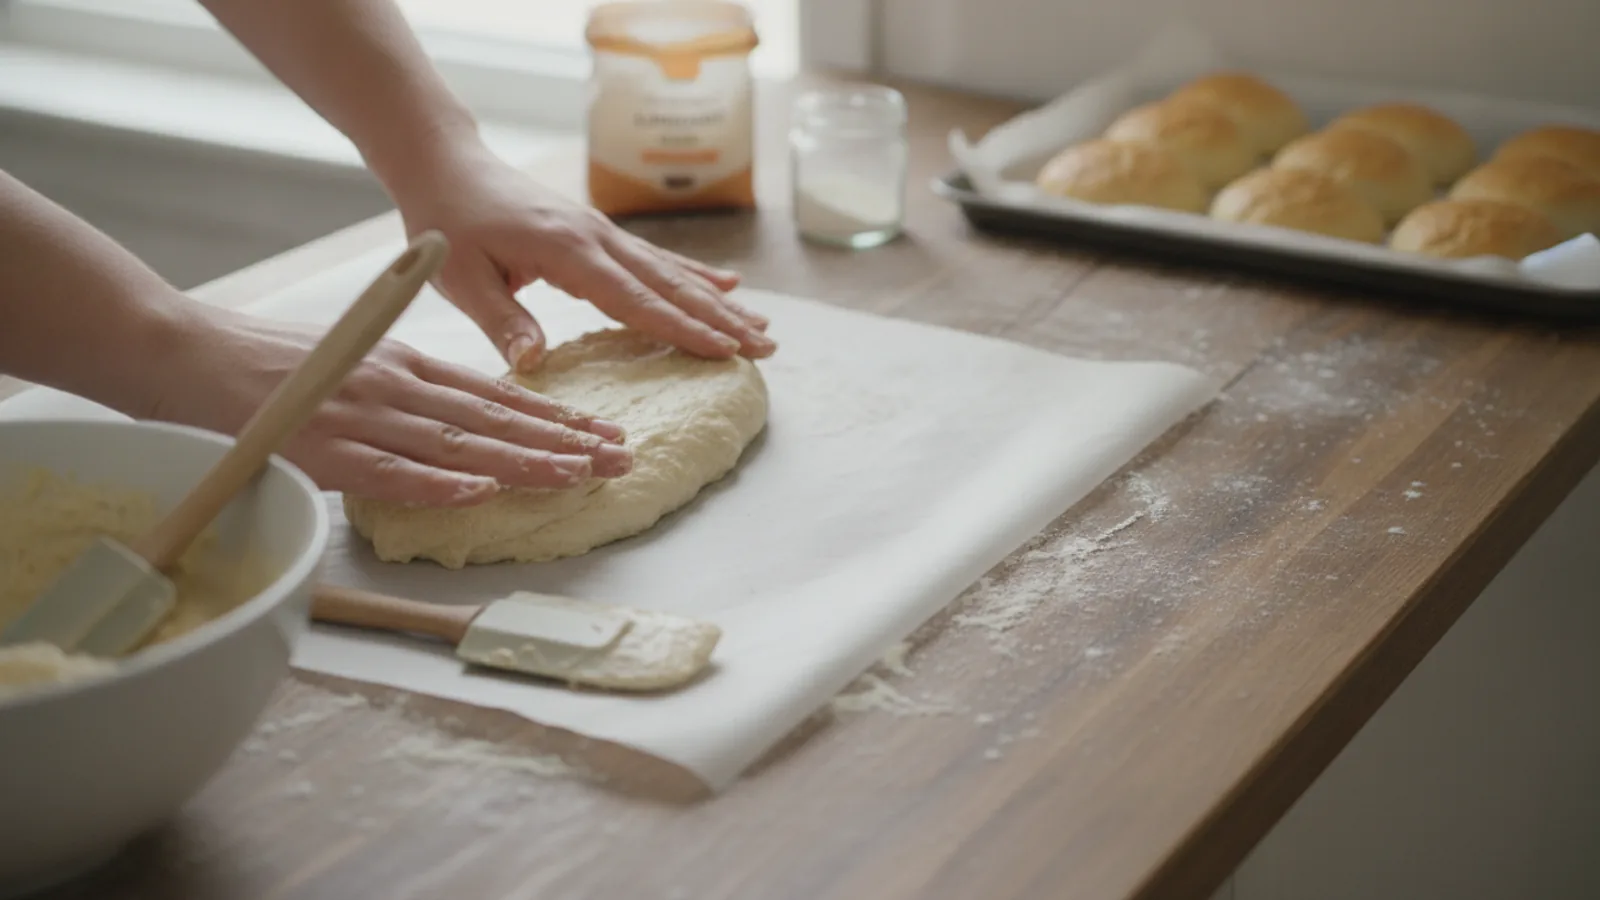
Lay the cut parchment flat on the pan and smooth it from the center outward with the flat of your hand. Small air bubbles under the paper let the sheet slide, so press them toward the nearest edge. If the paper refuses to lie flat, flip it over; one side often curls less than the other. Now dust the parchment with a thin, even layer of coconut flour or almond flour, tapping the pan to spread it, and shake off the excess. Lightly wet your hands with cool water and pat them dry until just damp. Damp hands glide over sticky low carb dough, while dry hands drag and tear it. Check the dusting by tilting the pan; you should see a faint haze, not a thick blanket. This preparation matters because a dry, flat, lightly dusted surface is the difference between a smooth press and a torn crust.
Press and lift with the paper
Place the chilled dough in the center of the prepared parchment. Press outward with the heel of your damp hand, working from the middle to the edges in short strokes. Stop before the dough reaches the paper edge, leaving a clean border you can grab later. If the dough sticks to your hand, dip your fingers in cool water again, shake off the drip, and continue. When the shape is right, slide the parchment, with the dough still on it, onto the baking sheet rather than lifting the dough alone. To move a fragile round, place a second sheet of parchment on top, flip the whole stack, peel away the bottom sheet, and slide the round onto the pan. Check the edges for thin spots and patch them with a pinch of dough. This method matters because the paper carries the dough, so gravity never gets a chance to tear it.
Bake, cool, and release cleanly
Bake at the temperature your recipe states, keeping the parchment between the dough and the pan. Check the dough at the earlier end of the suggested time range by looking through the oven door, since low carb doughs brown quickly at the edges. When the crust is set and the center springs back lightly, pull the pan out and set it on a wire rack. Let the baked piece cool on the parchment for at least ten minutes before you try to move it. Warm low carb crusts are brittle; cooling lets the structure firm up so it releases in one piece. To free the crust, slide a thin spatula under the parchment edge and lift the paper away from the food, not the food away from the paper. If any spot clings, slide the spatula between the paper and the crust and ease it loose. This order matters because releasing at the right moment prevents cracked edges and lost corners.
Quick Reference
| Situation | Action | Why it helps |
|---|---|---|
| You are standing in the store and two parchment packages look identical. | Read both labels for the words silicone and an oven-safe temperature rating, then choose the one that names the coating and lists a clear heat range. | A named coating and temperature rating tell you the paper can handle sticky dough and oven heat, while an unnamed non-stick claim gives you nothing to verify. |
| Your dough is already pressed and sticking to the parchment. | Slide the whole parchment sheet onto a tray, chill the tray for fifteen minutes, then dust the top lightly with coconut flour and lift the parchment edge to peel it away from the dough. | Cold firms the fat that makes the dough tacky, and dusting plus edge-lifting reduces the pull on a fragile shape that could otherwise tear. |
| The baked crust will not release from the liner after cooling. | Slide a thin spatula between the parchment and the crust, work around the edge in small strokes, and lift the paper away rather than pulling the food. | Pulling the food stresses its weak points, while separating the paper first lets the crust stay whole and keeps crumbs off your serving plate. |
Common Issues
- Dough sticks to a shiny liner that was not labeled as silicone coated.: Stop pressing and move the dough to a confirmed silicone-coated parchment sheet. If the dough has already spread, chill it on the old sheet for fifteen minutes, dust the top with coconut flour, and lift it with a thin spatula onto the new sheet. Then run the water-bead test on the new paper before continuing.
- Parchment curls at the corners and lifts the dough edge in the oven.: Cut a smaller sheet that overhangs the pan by only one inch, or fold the overhang down along the outside of the pan before baking. Press the paper flat and push out air bubbles before adding dough. If curling continues, place a second pan on top for the first few minutes of baking to hold the paper down.
- The bottom of the crust browns too fast on the parchment.: Move the pan to a higher rack and reduce the baking time slightly, checking through the door near the early end of the range. If browning still runs ahead, place a second empty pan on the rack below the first to shield the bottom. Record the adjustment on your recipe card so the next bake starts closer to correct.
Advanced Tips
- For very wet dough, cut two parchment sheets, press the dough between them, peel the top sheet away, and bake on the bottom sheet for a clean, even surface.
- Trace your pan outline on the parchment with a pencil before cutting, then flip the paper pencil-side down so no graphite touches the food.
- Keep a dedicated roll of parchment for dough work only; using the same roll for greasy foods leaves residue that can make the next sheet less effective.
Final Checklist
- The parchment label names a silicone release coating and lists an oven-safe temperature rating.
- The cut sheet overhangs the pan evenly and lies flat with no trapped air bubbles.
- A water-bead test on the sheet shows drops that stay raised instead of spreading.
- The chilled dough releases from the paper with a gentle lift after cooling on a rack.
FAQ
Can I use waxed paper for low carb dough?
No. Waxed paper carries a wax layer rather than a silicone coating, and that wax softens at low oven heat and can transfer to your food. Use it only for cold tasks such as wrapping or lining a container, and reserve silicone-coated parchment for anything that goes into the oven. If you are unsure which product you have, read the package label and look for the words parchment and silicone.
Why does my dough stick even on parchment?
The most common causes are a sheet with no silicone coating, dough that is too warm, or a surface that was never dusted. Chill the dough for fifteen minutes, dust the parchment lightly with coconut flour, and dampen your hands before pressing. If the paper fails the water-bead test, replace it. Sticking usually comes from the sheet or the dough temperature, not from your shaping method.
How do I move a fragile pressed round onto the pan?
Keep the dough on its parchment at all times. Slide your hand or a thin spatula under the paper, lift the whole sheet, and set it on the baking pan. For a very soft round, place a second parchment sheet on top, flip the stack, peel off the first sheet, and let the round settle onto the pan. This keeps the paper as the support so the dough never carries its own weight.