Label Freezer Meals With Dates And Ingredients
A practical step-by-step guide to label freezer meals with dates and ingredients, including preparation, instructions, common issues, tips, and next steps.
Label Freezer Meals With Dates And Ingredients
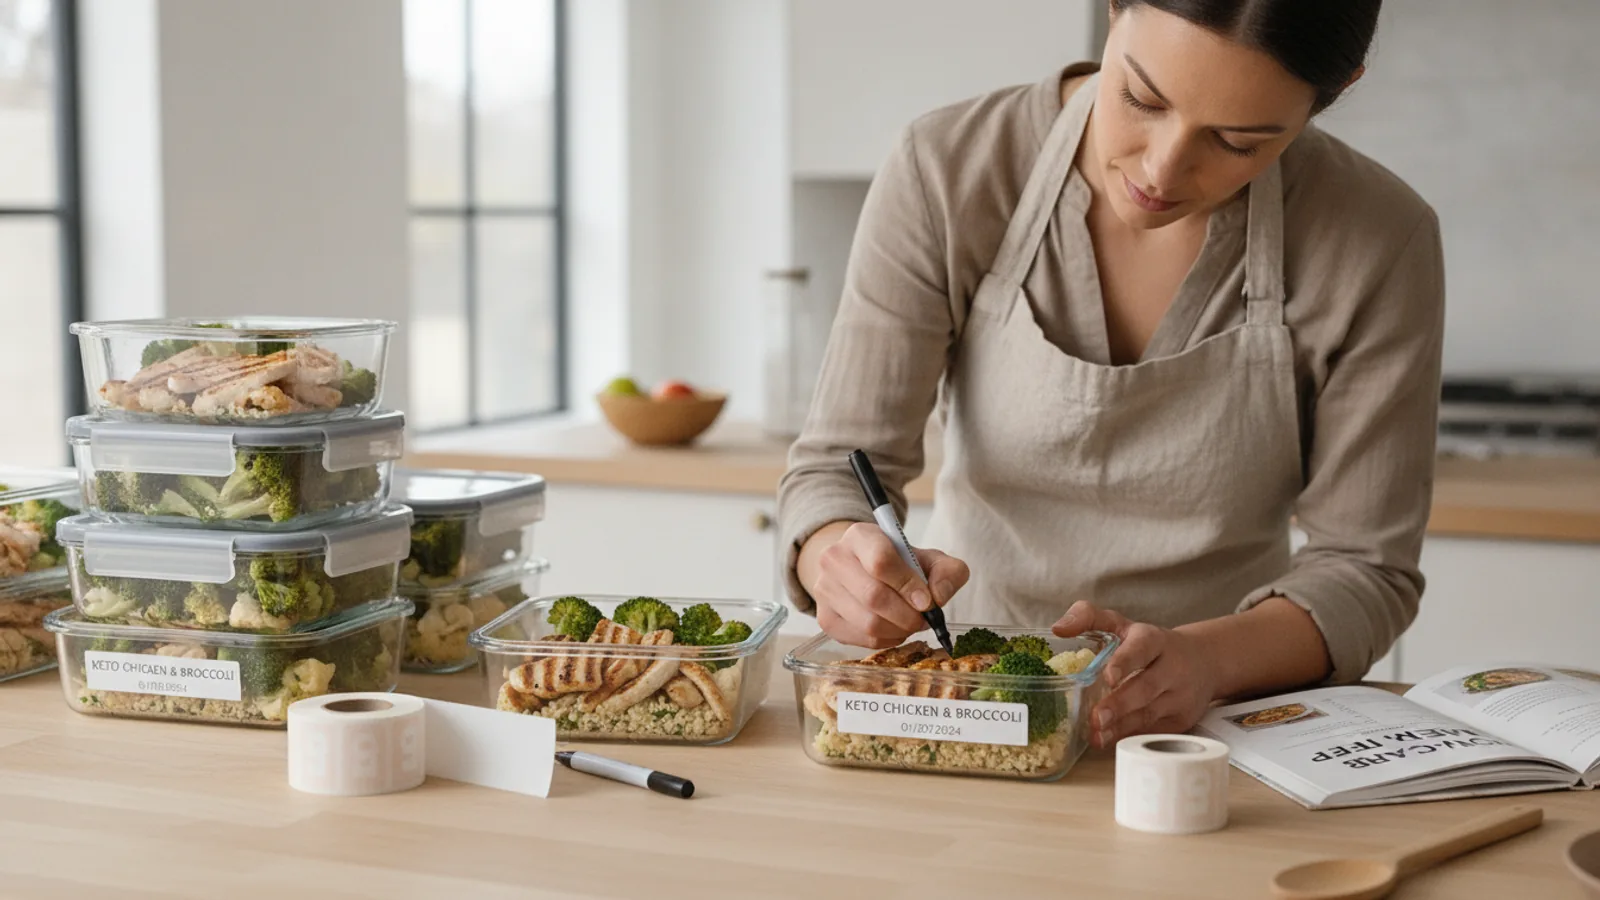
Labeling freezer meals with dates and ingredients turns a crowded freezer into a reliable pantry. A good label records when the meal was frozen, what is inside it, how long it keeps, and how to reheat it. This guide walks you through choosing labels that survive cold and moisture, writing clear information, and building a simple system you can repeat every time you cook ahead.
Fast Answer
- Write the meal name, freeze date, use-by date, and main ingredients on every container before the food goes into the freezer.
- Use cold-resistant labels and a permanent marker, then place the label where you will see it without digging through the freezer.
Before You Start
- Choose labels and tape that stay stuck at freezer temperatures and resist moisture from condensation.
- Gather a permanent marker, a pen that writes on frozen surfaces, and a roll of clear tape as backup.
- Clear a flat work area near the freezer so you can label containers right before they go in.
- Decide on a simple date format and ingredient shorthand so every label reads the same way.
Step-by-Step Instructions
Choose labels that survive the cold
Start by testing your labels before you trust them with a full batch of meals. Write a sample label, stick it on a spare container, and freeze it for a day. Then pull it out and check whether the ink smears when you rub it with a damp finger. Freezer air is dry, but containers often collect condensation as they warm, and that moisture is what destroys ordinary paper labels. Look for labels described as freezer-safe or designed for cold storage, and keep a roll of clear tape nearby for extra security. The practical check is simple: if the label lifts at the corner or the writing fades after one freeze-and-thaw cycle, switch to a different label or cover the whole label with tape. This matters because a label that fails in the freezer is the same as no label at all, and you will lose the date and ingredient information exactly when you need it.
Write the meal name and freeze date first
Before you add any other detail, write two things on every label: what the meal is and the date you froze it. Use a consistent format such as a three-letter month and a two-digit day, and add the year if you keep meals longer than a few months. Put the meal name at the top in larger letters and the freeze date directly below it. Do this while the food is still on the counter and your hands are clean, because once containers go into the freezer you will not want to pull them out again. The check here is to read the label from arm's length; if you cannot tell the meal and the date at a glance, rewrite it. This matters because the freeze date is the anchor for every later decision about whether the food is still good, and a clear name stops you from serving a dessert as a side dish.
List the main ingredients and allergens
After the name and date, list the main ingredients in plain words. You do not need a full recipe, but you should note anything that changes how the meal is used or who can eat it. Write major components such as meat, dairy, grains, and vegetables, and clearly mark common allergens like milk, eggs, wheat, soy, peanuts, and tree nuts. If the meal contains a sauce or seasoning that is easy to forget, add a short note such as spicy or contains coconut. The practical check is to imagine handing the container to a guest or family member and asking whether they could decide safely from the label alone. This matters because ingredients drive both reheating choices and dietary decisions, and a missing allergen note can turn a helpful meal into a health risk for someone with a serious allergy.
Add a use-by date and reheating note
Once the freeze date is written, add a use-by date based on how long that type of meal stays at its best in your freezer. Soups, stews, and cooked meats generally hold quality longer than baked goods or delicate sauces, so set the date with the food in mind rather than using one rule for everything. Write the use-by date in the same format as the freeze date so the two are easy to compare. Then add a short reheating note, such as thaw overnight, heat covered, or bake from frozen. The check is to confirm that the use-by date is later than the freeze date and that the reheating note matches how you actually plan to cook the meal. This matters because a use-by date turns a vague container into a planned meal, and a reheating note prevents you from ruining texture by heating the wrong way.
Label the container on the right spot
Where you place the label matters as much as what you write. Stick the main label on the top of the lid or on the front face of the container, wherever you will see it when the container sits in the freezer. Avoid the bottom, because stacked containers hide the bottom label and you will have to unstack everything to read it. If you use bags, write on the flat part of the bag before filling it, or use a label on the sealed edge. For containers with curved sides, press the label down firmly from the center outward to push out air. The practical check is to place the container in the freezer the way you normally store it and confirm the label faces outward. This matters because a perfectly written label is useless if you cannot see it without moving five other meals.
Build a simple freezer inventory
A label on the container is the first layer; a running list is the second. Keep a sheet of paper or a note near the freezer and add each meal as you freeze it, recording the name, freeze date, use-by date, and quantity. When you take a meal out, cross it off or mark it used. Update the list at the same time you label, so the two records never drift apart. The check is to compare your list with the freezer once a week and correct any differences you find. This matters because even good labels get buried, and a short list lets you plan meals, use the oldest items first, and avoid buying duplicates of food you already have. A list also makes it obvious when the freezer is full and it is time to cook from it instead of adding more.
Review and refresh labels over time
Labels age along with the food, so set a routine to review them. Once a month, open the freezer and check for labels that have faded, curled, or fallen off. Rewrite any label you cannot read clearly, and replace lost labels using the inventory list as your source of truth. If a container has no label and no list entry, treat it as unknown and decide whether it is worth keeping. Also watch for frost or ice crystals inside packaging, which can signal that a seal failed and the food may have dried out. The practical check is to pick three random containers and confirm that each one has a readable name, a freeze date, and a use-by date. This matters because a labeling system only works if it stays accurate, and a few minutes each month prevents a freezer full of food you cannot safely identify.
Quick Reference
| Situation | Action | Why it helps |
|---|---|---|
| You are about to freeze a freshly cooked meal and the counter is crowded. | Write the label before you fill the container: meal name, freeze date, use-by date, main ingredients, and a short reheating note, then stick it on the lid facing outward. | Labeling first keeps the information accurate and saves you from trying to write neatly on a cold, frosted surface later when the food is already packed away. |
| You find an unlabeled container in the back of the freezer. | Check your freezer inventory for a matching entry, and if no record exists, mark the container unknown and set it aside for inspection rather than serving it. | Without a date and ingredient list you cannot judge safety or suitability, so treating the item as unknown protects you from eating food that may be spoiled or contain an allergen. |
| A label has peeled off or the writing has faded beyond reading. | Pull the container, compare it with your inventory list, write a fresh label with the original dates if you can confirm them, and reattach it with tape over the edges. | A replacement label restores the record you need for planning and safety, while taping the edges stops the same peeling problem from happening again. |
Common Issues
- The marker smears or fades after the container goes into the freezer.: Switch to a permanent marker made for cold or wet surfaces, write on a dry label before applying it, and cover the finished label with a strip of clear tape so condensation cannot lift the ink.
- Labels fall off containers that are stacked or handled often.: Press the label firmly onto a flat, dry area, avoid curved corners, and place a piece of tape over the whole label. If peeling continues, write directly on the lid with a freezer-safe marker instead.
- You cannot remember what you froze or when, even though the labels are clear.: Start a simple inventory sheet next to the freezer, add each meal as you store it, and cross items off when you use them. Review the list weekly so it stays accurate and useful.
Advanced Tips
- Use a two-line label format: the top line for the meal name and servings, the bottom line for freeze date, use-by date, and key allergens, so every container reads the same way.
- Freeze meals in flat, stackable portions and label the narrow edge as well as the top, which makes a chest freezer easier to sort without lifting heavy containers.
- Keep a small laminated card of your date format and common ingredient words near the freezer so anyone in the household can label a meal correctly.
Final Checklist
- Every container has a readable meal name, freeze date, and use-by date.
- Allergens and major ingredients are written clearly on the label.
- A short reheating note tells you how to cook the meal safely.
- Your freezer inventory list matches what is actually stored inside.
FAQ
What should I write on a freezer meal label?
Write the meal name, the date you froze it, a use-by date, the main ingredients, any common allergens, and a brief reheating note. Add the number of servings if it helps you plan. Keep the format consistent so you can read every container quickly, and place the label where it faces outward in the freezer.
How long can I keep labeled freezer meals?
Storage time depends on the type of food, how it was packaged, and how cold your freezer stays. Check your freezer manufacturer's guidance and food safety resources for specific foods. As a habit, write a use-by date when you freeze the meal and use the oldest items first so quality stays at its best.
What if a label falls off or becomes unreadable?
Check your freezer inventory for a matching entry and rewrite the label using the original dates if you can confirm them. If no record exists, treat the container as unknown and decide whether it is worth keeping. Reattach the new label with tape over the edges to prevent the same problem.