Celeriac Breakfast Hash With Eggs
A practical step-by-step guide to celeriac breakfast hash with eggs, including preparation, instructions, common issues, tips, and next steps.
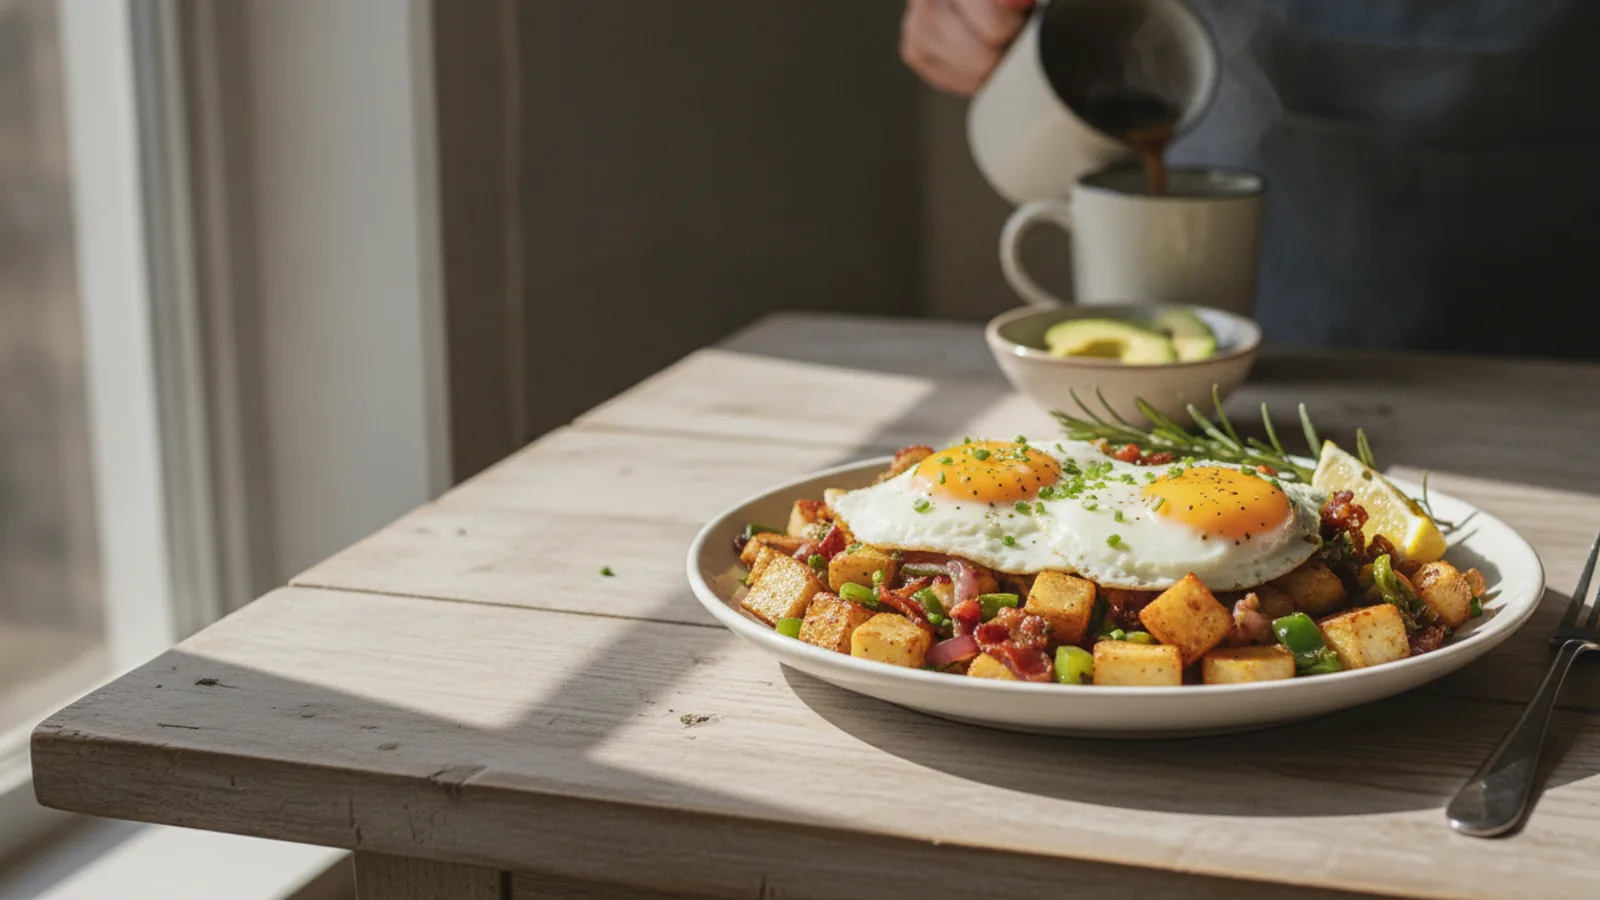
Celeriac Breakfast Hash With Eggs
Celeriac breakfast hash with eggs turns a humble root vegetable into a satisfying, savory morning meal. The method uses a two-stage cook: first par-cook diced celeriac until tender, then pan-fry it with onions and seasonings until deeply browned, creating crisp edges and a creamy interior. Eggs are nestled into wells and gently cooked until the whites set and the yolks remain soft. This guide covers ingredient preparation, key doneness cues, and adjustments for different textures. It is designed for a home cook who wants a reliable, repeatable result without guesswork.
Fast Answer
- Par-cook diced celeriac in simmering water for 8 to 10 minutes, then drain and pan-fry with onion and oil until browned.
- Make wells in the hash, add eggs, cover, and cook on low until whites are set and yolks are still soft.
Before You Start
- Peel the celeriac with a sharp knife, cutting away all tough outer skin and any brown spots until you reach clean, white flesh.
- Cut the celeriac into half-inch cubes, keeping pieces uniform so they cook at the same rate and brown evenly in the pan.
- Dice one medium onion and set it aside; measure your cooking oil, salt, pepper, and any dried herbs before you turn on the heat.
- Have four eggs at room temperature, plus a lid that fits your skillet, so the eggs can steam gently without drying out.
Step-by-Step Instructions
Par-cook the celeriac cubes
Place the celeriac cubes in a saucepan and add enough cold water to cover them by about an inch. Add a generous pinch of salt. Bring to a boil over high heat, then reduce to a steady simmer. Cook for 8 to 10 minutes, until a cube can be pierced easily with a paring knife but still holds its shape. Drain immediately in a colander and let them steam dry for 2 minutes. This par-cooking step is essential because raw celeriac is dense and would take much longer to become tender in a skillet, risking burnt edges before the center softens. The practical check is the knife test: if the blade slides in with slight resistance and the cube does not crumble, it is ready. Overcooked cubes will turn mushy when fried, so err on the firm side. Letting them steam dry removes surface moisture, which helps them brown rather than steam in the pan.
Heat the pan and soften the onion
Set a wide, heavy skillet over medium heat and add two tablespoons of cooking oil. Swirl the oil to coat the bottom. When the oil shimmers but does not smoke, add the diced onion and a pinch of salt. Cook for 4 to 5 minutes, stirring occasionally, until the onion turns translucent and soft but not browned. The goal here is to build a sweet, savory base without burning the onion, which would turn bitter. A practical check is to watch the edges of the onion pieces: they should look glassy and slightly yellow. If they start to brown before they soften, lower the heat. Keeping the onion in a single layer helps it cook evenly, so use a skillet large enough to hold everything comfortably. This step also seasons the pan, which will flavor the celeriac as it fries.
Fry the celeriac until crisp and golden
Add the drained celeriac cubes to the skillet with the onion. Stir to combine, then spread everything into an even layer. Let the cubes sit undisturbed for 3 to 4 minutes so they develop a golden crust. Stir, spread again, and repeat this cycle for a total of 10 to 12 minutes. The cubes should shrink slightly and turn deep golden brown on most sides. If they are pale after 8 minutes, increase the heat slightly; if they darken too fast, reduce it. The check is visual and auditory: you want a steady sizzle, not a frantic sputter, and the edges should look lacquered. This long, patient frying is what gives the hash its signature texture, contrasting the creamy interior with the crisp exterior. Season with salt, pepper, and dried herbs in the last two minutes so they toast without burning.
Create wells and add the eggs
Reduce the heat to low. Use the back of a spoon to press four shallow wells into the hash, spacing them evenly around the skillet. Crack one egg into a small bowl, then slide it gently into a well. Repeat with the remaining eggs. Season each egg with a pinch of salt and pepper. The wells keep the eggs in place and allow them to cook directly against the hot pan, while the surrounding hash insulates them. A practical check is to make sure no egg white is running freely across the surface; if it is, the wells are too shallow, so reshape them. Keeping the heat low is important because high heat will toughen the whites and create rubbery edges before the yolks are warm. If you prefer firmer yolks, you can cook them a minute longer, but start with low heat and check frequently.
Cover and steam until the whites set
Cover the skillet with a lid and cook for 4 to 6 minutes. The trapped steam gently sets the egg whites from the top down while the pan heat sets the bottom, giving you tender whites and soft yolks. Listen for a gentle sizzle; if you hear nothing, the heat may be too low, so raise it slightly. Check the eggs after 4 minutes by gently jiggling the pan: the whites should be opaque and firm, while the yolks still wobble slightly when you touch the pan. If the whites are still translucent, cover and cook another minute. The practical check is to look at the thickest part of the white near the yolk; it should be completely opaque. Undercooked whites are unappetizing, but overcooked yolks lose their richness. Remove the lid as soon as the whites are set to stop the cooking.
Rest, garnish, and serve
Turn off the heat and let the skillet rest, uncovered, for 1 minute. This brief rest allows the eggs to finish setting and makes them easier to lift without breaking. Use a wide spatula to serve one egg with a generous portion of hash onto each plate. Garnish with chopped fresh herbs if you have them, or a spoonful of plain yogurt or a squeeze of lemon juice for brightness. The rest also lets the hash firm up slightly, so it holds together on the plate. A practical check is to slide the spatula under a section and lift; if it holds together, it is ready. If the hash seems greasy, you can drain excess oil by tilting the pan before serving. Taste one cube and adjust with a final pinch of salt, since the eggs absorb salt differently than the vegetables.
Quick Reference
| Situation | Action | Why it helps |
|---|---|---|
| The celeriac cubes are browning too quickly on the outside. | Lower the heat to medium-low and add a splash of water to the pan, then cover for 2 minutes to steam the centers. | The water creates steam that cooks the interior without burning the exterior, balancing doneness. |
| You want to prep the dish ahead for a busy morning. | Par-cook the celeriac, cool it completely, and refrigerate it in a covered container for up to two days before frying. | Chilling firms the cubes and prevents them from turning mushy when reheated in the skillet. |
| The egg whites are setting but the yolks are still cold. | Cover the pan and cook on low for 1 to 2 more minutes, checking every 30 seconds by gently shaking the pan. | Gentle steam heat warms the yolks through without overcooking the whites or making them rubbery. |
Common Issues
- The hash turns out soggy instead of crisp.: Drain the par-cooked celeriac well and let it steam dry before frying. Use a wide skillet and avoid crowding; cook in batches if needed. Increase the heat slightly and resist stirring too often.
- The eggs stick to the pan and break when serving.: Make sure the pan is well oiled and the heat is low before adding the eggs. Use a thin spatula and slide it under each egg gently. If sticking is frequent, cook the eggs in wells with a little extra oil.
- The celeriac stays tough after frying.: Par-cook the cubes longer, until a knife slides in with only slight resistance. Cut cubes smaller, about half an inch, and simmer them until just tender before draining and patting dry.
Advanced Tips
- Add a pinch of smoked paprika or ground cumin to the oil before frying the celeriac for a warm, earthy depth.
- For extra crunch, stir in a handful of chopped nuts or seeds during the last two minutes of frying.
- Finish with a drizzle of good olive oil and a scattering of fresh herbs like parsley or chives just before serving.
Final Checklist
- Celeriac cubes are par-cooked until a knife slides in with slight resistance, then drained and steamed dry.
- Onion is soft and translucent, and the celeriac is deeply browned with crisp edges before eggs are added.
- Egg whites are fully opaque and set, while yolks still wobble slightly when the pan is gently shaken.
- The dish rests for one minute off heat, then is seasoned to taste and served immediately.
FAQ
Can I use other root vegetables instead of celeriac?
Yes, you can substitute potatoes, parsnips, or turnips, but adjust the par-cooking time. Potatoes may need 5 to 7 minutes, parsnips 6 to 8 minutes, and turnips 4 to 6 minutes. The principle is the same: cook until a knife slides in with slight resistance, then drain and fry until browned.
How do I keep the eggs from overcooking?
Cook the eggs covered on low heat and check every minute after the first four minutes. The whites should be fully opaque and firm, but the yolks should still jiggle slightly when you shake the pan. Remove the pan from the heat immediately once the whites are set, as residual heat will continue cooking the eggs.
Can I make this dish ahead of time?
You can par-cook the celeriac and refrigerate it for up to two days. For best results, fry the hash and cook the eggs just before serving. If you must reheat the whole dish, do so gently in a covered skillet over low heat, but the eggs may firm up more than when freshly cooked.