Baked Egg Muffins For Packed Lunches
A practical step-by-step guide to baked egg muffins for packed lunches, including preparation, instructions, common issues, tips, and next steps.
Baked Egg Muffins For Packed Lunches
Baked egg muffins are a practical, make-ahead protein for packed lunches because they hold their shape, taste good cold or at room temperature, and can be built from whatever vegetables, cheese, or cooked meat you already have. This guide explains how to prepare a batter that sets without weeping, bake a batch evenly, cool and store the muffins safely, and pack them so they arrive intact. It also covers common problems such as sticking, rubbery texture, and sogginess, plus simple variations and a checklist you can follow every time.
Fast Answer
- Whisk 8 eggs with 60 ml milk, salt, and pepper, then fold in 150 g chopped vegetables and 80 g cheese before baking in a greased 12-cup muffin tin at 180°C for 20 to 24 minutes.
- Cool muffins completely, refrigerate up to four days in a sealed container, and pack two or three with a cold pack and a separate container for juicy sides.
Before You Start
- Gather a 12-cup muffin tin, paper liners or grease, a mixing bowl, a whisk, a knife and cutting board, and a measuring jug.
- Chop and cook any watery vegetables, such as mushrooms, zucchini, or spinach, and squeeze or drain them well before mixing.
- Grate or crumble 80 g of cheese and measure 60 ml of milk or a plain unsweetened yogurt alternative.
- Set out cooked meat, herbs, and spices, and preheat the oven to 180°C with a rack in the middle position.
Step-by-Step Instructions
Prepare the pan and oven
Preheat the oven to 180°C and place a rack in the middle. Grease every cup of a 12-cup muffin tin generously with oil or butter, or line each cup with a paper liner and grease the liner lightly. If you use paper liners alone, egg can stick to the paper and tear the muffin, so a thin coat of oil is worth the extra moment. A practical check is to run your finger around the inside of one cup: it should feel slick, with no dry patches. This matters because egg batter clings to bare metal and to dry paper, and a stuck muffin breaks apart when you lift it, which wastes food and makes packing messy. Set the prepared tin near your mixing bowl so you can fill the cups without carrying a full tin across the kitchen.
Mix the egg base gently
Crack 8 eggs into a large bowl, add 60 ml milk, a quarter teaspoon of salt, and a few grinds of pepper. Whisk just until the yolks and whites are combined and the mixture is a uniform pale yellow, about 20 to 30 seconds. Over-whisking whips air into the eggs, and those air pockets expand in the oven and then collapse, leaving a spongy, rubbery muffin. A practical check is to lift the whisk and look at the stream: it should fall in a smooth ribbon, not foam. This matters because the texture of the finished muffin depends more on gentle mixing than on any single ingredient. If you want a richer flavor, replace the milk with the same amount of plain yogurt or a splash of cream, but keep the total liquid near 60 ml so the batter still sets firmly.
Fold in vegetables and cheese
Stir in 150 g of chopped, cooked, and well-drained vegetables, 80 g of grated or crumbled cheese, and any cooked meat or herbs. Use a spatula and fold from the bottom up until the pieces are evenly scattered, about 10 turns. A practical check is to scoop a spoonful and see that each cup will get a balance of egg and fillings, not a cup of mostly vegetables. This matters because watery vegetables release liquid as they bake, and that liquid pools at the bottom of the cup and makes the muffin soggy. If your vegetables feel wet, press them in a clean towel before folding. Keep the total fillings near 230 g; more than that leaves too little egg to bind the muffins, and they crumble when you take them out of the pan.
Fill the cups evenly
Divide the batter among the 12 cups using a ladle or a measuring cup with a spout. Fill each cup about three-quarters full, leaving a small rim of space. A practical check is to compare the cups side by side: they should look nearly level, with no cup more than a little fuller than the others. This matters because uneven cups bake at different speeds, so the shallow ones dry out while the deep ones stay liquid in the middle. If you have extra batter, pour it into an oiled ramekin and bake it alongside the tin. If you have less, add a spoonful of water to the empty cups before baking to keep the pan from warping, then discard that water after the muffins come out. Wipe any batter that dripped onto the pan before it bakes.
Bake until just set
Bake for 20 to 24 minutes, turning the tin once halfway through if your oven browns unevenly. Start checking at 20 minutes. A practical check is to insert a thin knife or skewer into the center of a middle muffin: it should come out clean or with only a few moist crumbs, and the top should feel firm and spring back when you press it lightly. This matters because egg continues to cook after it leaves the oven, so pulling the muffins at the moment they are barely set prevents the rubbery, dry texture that comes from overbaking. If the centers still look wet and jiggle, bake for 2 more minutes and check again. If the tops brown too fast, loosely cover the tin with foil and continue baking until the centers set.
Cool, release, and store safely
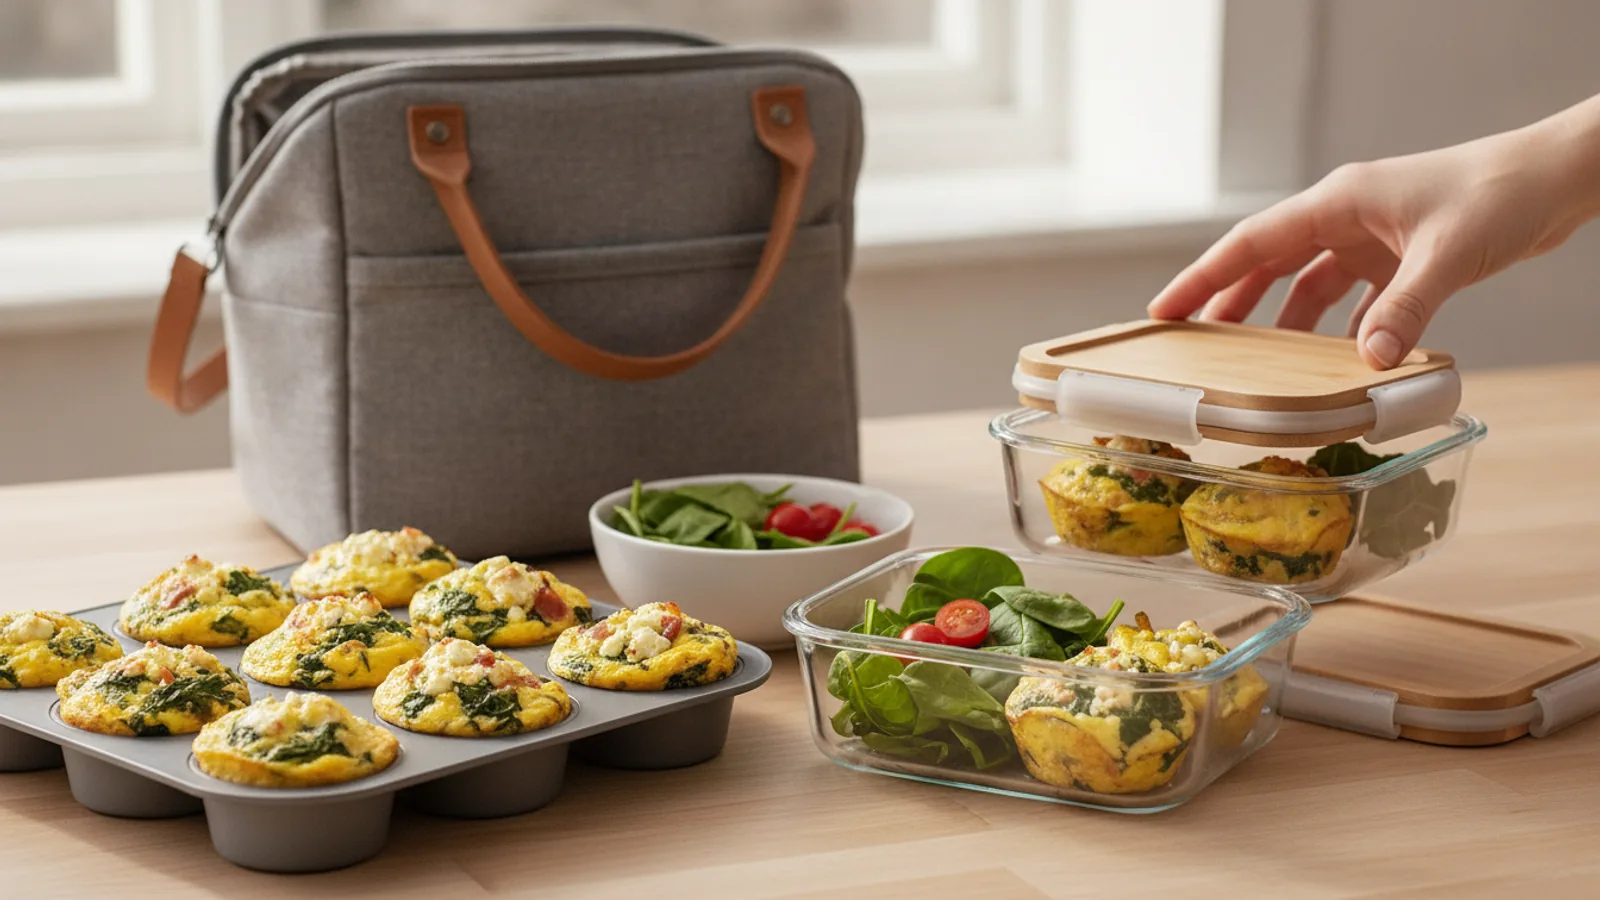
Let the tin sit on a wire rack for 5 minutes, then run a thin knife around any muffin that resists and lift each one out. Cool completely on the rack, about 20 minutes, before storing. A practical check is to touch the bottom of a muffin: it should feel cool, not warm, because trapping warmth in a sealed container creates condensation that makes the muffins wet. This matters for both texture and food safety, since a cool muffin stays firm and packs better. Refrigerate in a sealed container for up to four days, or freeze in a single layer and then transfer to a freezer bag for up to two months. For packed lunches, place muffins in the main compartment and keep juicy sides separate so the egg does not absorb moisture.
Quick Reference
| Situation | Action | Why it helps |
|---|---|---|
| Your vegetables release a lot of water while baking. | Cook the vegetables first, drain them in a sieve, and press them in a clean towel until they stop dripping before you fold them into the egg. | Watery fillings pool at the bottom of the cup and steam the egg, which leaves a soggy layer that makes the muffin fall apart when you pick it up. |
| The muffins stick to the pan even though you greased it. | Cool the tin for exactly five minutes, slide a thin flexible knife around the edge, and lift with a small offset spatula instead of pulling with your fingers. | Egg proteins bond to hot metal, and forcing a muffin out too early tears the base; a short rest and a gentle release keep each muffin whole. |
| You want to pack muffins for a lunch that sits in a bag for hours. | Chill the muffins overnight, place them in a sealed container with a reusable cold pack, and keep cut fruit or juicy salads in a separate small container. | Egg is a perishable protein, so cold storage slows bacterial growth, and separating wet sides prevents the muffins from becoming damp and crumbly. |
Common Issues
- The muffins are rubbery and dry instead of tender.: Reduce the baking time by two minutes and check with a skewer at 20 minutes; pull the tin when the center is just set and the top springs back. Also whisk the eggs only until combined, and add the full 60 ml of milk so the batter stays moist.
- The muffins have a pool of liquid at the bottom.: Cook and drain watery vegetables such as mushrooms, zucchini, and spinach, and squeeze them in a towel before mixing. Keep the total fillings near 230 g, and do not add extra liquid beyond the measured milk.
- The muffins stick to the pan or tear when you remove them.: Grease every cup generously, including the sides, or use oiled silicone liners. Let the tin rest for five minutes after baking, then loosen each muffin with a thin knife before lifting it out with a spatula.
Advanced Tips
- For a custardy center, replace 60 ml of the milk with 60 ml of plain yogurt and bake at 170°C for a few extra minutes; the gentler heat helps the yogurt set without curdling.
- Toast breadcrumbs or crushed cornflakes and sprinkle them on top before baking to add a crisp layer that stays distinct even after the muffins are chilled.
- Freeze baked muffins in a single layer on a tray, then move them to a freezer bag; this keeps them from pressing together and lets you pull out just one or two for a lunch.
- Add a pinch of baking powder only if you want a lighter, puffier muffin, and use no more than a quarter teaspoon for the whole batch to avoid a soapy taste.
Final Checklist
- The oven is preheated to 180°C and the rack is in the middle position.
- Every cup of the muffin tin is greased or lined and greased.
- Vegetables are cooked, drained, and pressed dry before mixing.
- The egg base is whisked just until combined, with no foam.
- Cups are filled three-quarters full and evenly divided.
- Muffins are cooled completely before they are sealed and stored.
FAQ
Can I make baked egg muffins ahead of time?
Yes. Bake and cool them completely, then refrigerate in a sealed container for up to four days. For longer storage, freeze them in a single layer and then move them to a freezer bag for up to two months. Reheat in a low oven or a toaster oven until warm, or eat them cold. Always pack them with a cold pack if they will sit in a lunch bag for more than two hours.
Why did my egg muffins turn out watery?
Watery muffins usually come from vegetables that release liquid during baking. Cook mushrooms, zucchini, onions, and peppers first, and squeeze spinach or grated zucchini in a clean towel until it stops dripping. Keep the total fillings near 230 g and use only the measured 60 ml of milk. If you add juicy ingredients such as tomatoes, seed them and drain them well before folding them into the egg.
How do I keep egg muffins from sticking to the pan?
Grease each cup generously with oil or butter, including the sides, or use silicone liners that you oil lightly. After baking, let the tin rest for five minutes, then run a thin knife around each muffin and lift it out with a small spatula. If you use paper liners, grease the paper too, because plain paper can bond to the egg and tear the muffin when you peel it away.